Ostatnie wpisy:

JSON Server - testowe REST API w kilka minut

2017-01-16 · · ·

Czasami chciałbyś od razu rozpocząć pracę na frontendzie aplikacji, ale okazuje się, że musisz czekać, aż zespół dopowiedziany za backend wystawi działające API.

Podobnie sprawa się ma z prototypowaniem. Chcesz zrobić coś szybko, ocenić nową koncepcję, stworzyć tutorial, czy poszukać odpowiedzi na pytanie lub sprawdzić który kształt odpowiedzi z serwera najlepiej pasuje. Potrzebujesz więc na tyle dobrego, pełnego prototypu, aby uzyskać wiarygodny osąd, czyli potrzebujesz backendu, CRUDów - JSONowej odpowiedzi z serwera, a przecież nie chcesz tracić dużo czasu na tworzenie prawdziwego web serwisu.

Może również się okazać, że API istniejące w twoim środowisku dev lub QA jest powolne, lub wadliwe, a potrzebujesz szybkich, spójnych i wiarygodnych odpowiedzi z serwera.

Podobnie, jeżeli musisz pracować offline, a chcesz mieć pod ręką działające API.

Odpowiedzią na te problemy jest JSON Server. Jest to bardzo przydatny opensourcowy moduł npm, chodzący na serwerze Express, który pozwala łatwo zamodelować backend. Przy minimalnej konfiguracji, w kilka minut otrzymujesz Web API, Web serwis, JSON API i RESTfull API na potrzeby dewelopmentu lub testowania.

Wymagania

  • Node.js: środowisko uruchomieniowe
  • npm: manager pakietów dla Node.js
  • dowolne narzędzie do wysyłania zapytań na serwer:

Instalacja

Aby zainstalować JSON Server, otwórz konsolę i wpisz poniższe polecenie:

npm install -g json-server

Flaga -g spowoduje, że serwer zostanie zainstalowany globalnie w systemie, co pozwoli uruchomić go z każdego miejsca.

Uruchamianie

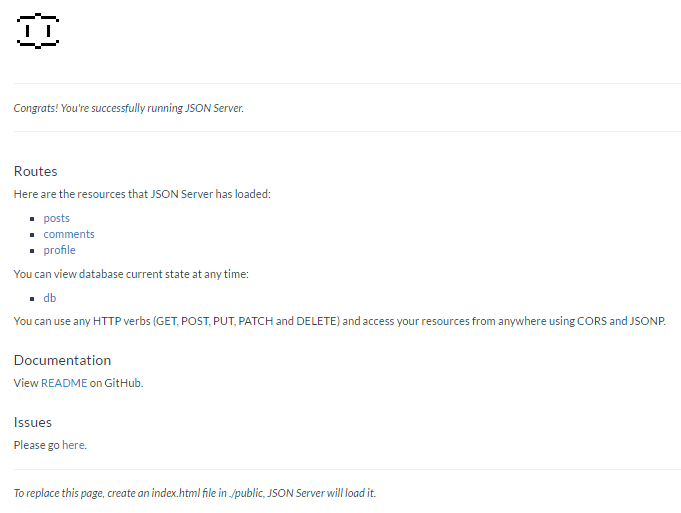
Aby uruchomić JSON Server, otwórz wiersz poleceń i wpisz jedno z poniższych poleceń (w zależności od tego, co jest źródłem danych):

json-server db.json

W tym przypadku źródłem danych jest plik db.json znajdujący się na dysku, np.:

{
  "posts": [
    { "id": 1, "title": "json-server", "author": "typicode" },
    { "id": 2, "title": "jsonplaceholder", "author": "also typicode" }
  ],
  "comments": [
    { "id": 1, "body": "some comment", "postId": 1 }
  ],
  "profile": { "name": "typicode" }
}
json-server http://jsonplaceholder.typicode.com/db

W kolejnym przypadku źródłem danych jest onlinowe REST API - JSONPlaceholder.

json-server db.js

W ostatnim przypadku źródłem danych jest skrypt JavaScriptowy; korzystając z pliku JS zamiast JSON, można utworzyć dane programowo:

function generatePosts () {
  var posts = []

  for (var id = 1; id <= 50; id++) {
    var title = 'Post ' + id;
    var author = 'John Doe';

    posts.push({
      "id": id,
      "title": title,
      "author": author
    })
  }

  return { "posts": posts }
}

JSON Server można również osadzić we własnym skrypcie JavaScriptowym:

var jsonServer = require('json-server');

var server = jsonServer.create();
var router = jsonServer.router('db.json');

server.use(jsonServer.defaults);
server.use(router);

server.listen(3000);

Routing

Domyślnie serwer zapewnia najpotrzebniejsze routingi. Zakładając, że uruchomiliśmy serwer, którego źródłem danych jest plik db.json, to w przypadku posts (plural routes) będą to:

  • GET /posts
  • GET /posts/1
  • POST /posts
  • PUT /posts/1
  • PATCH /posts/1
  • DELETE /posts/1

natomiast dla profile (singular routes) mamy:

  • GET /profile
  • POST /profile
  • PUT /profile
  • PATCH /profile

Można również dodać inne routingi. W tym celu należy stworzyć plik routes.json, np.:

{
  "/api/": "/",
  "/blog/:resource/:id/show": "/:resource/:id",
  "/blog/:title": "/posts?title=:title"
}

Następnie uruchamiamy serwer, używając opcji --routes lub -r:

json-server db.json --routes routes.json

W wyniku tego otrzymujemy dodatkowe routingi:

  • /api/posts odpowiadający /posts
  • /api/posts/1 odpowiadający /posts/1
  • /blog/posts/1/show odpowiadający /posts/1
  • /blog/jsonplaceholder odpowiadający /posts?title=jsonplaceholder

Właściwości

Żądania POST, PUT, PATCH i DELETE wykonywane na bazie, której źródłem jest plik json z dysku, modyfikują również zawartości tego pliku źródłowego; w przypadku innych źródeł, operacje działają na kopii schematu.

Poza wspomnianymi żądaniami JSON Server wspiera również GET i OPTIONS.

Wartości identyfikatora (id) nie są zmienne. Każda wartość id w body żądania PUT lub PATCH będzie ignorowana. Tylko wartość ustawiona w żądaniu POST będzie respektowana, o ile nie jest już zajęta.

POST, PUT lub PATCH powinien zawierać nagłówek Content-Type: application/json, aby można było używać JSONa w body żądania. W przeciwnym przypadku w odpowiedzi otrzymamy 200 OK, ale bez wprowadzania zmian do danych.

Można uzyskać dostęp do API z dowolnego miejsca za pomocą CORS i JSONP.

Domyślnie serwer uruchamia się na porcie 3000 localhosta: http://localhost:3000.

Wiele domyślnych ustawień, np. delay (dodaje opóźnienie odpowiedzi serwera), host, port, można nadpisać, tworząc własny plik konfiguracyjny json-server.json, np.:

{
  "port": 3001,
  "delay": 2000
}

a następnie uruchomiając, serwer wskazując na ten plik, używając opcji --config lub -c:

json-server db.json -c json-server.json

Jeżeli plik konfiguracyjny będzie dokładnie nazywał się: json-server.json, to zostanie on automatycznie załadowany podczas uruchamiania serwera, więc można pominąć opcję --config lub -c. Można również posłużyć się komendami wiersza poleceń, jakie zapewnia JSON Server; wystarczy wpisać w konsoli: json-server -h lub json-server --help, aby poznać dostępne opcje. Na przykład, żeby zmienić port, wystarczy wpisać:

json-server db.json -p 3001

Więcej informacji można znaleźć na stronie projektu.

Możliwości

JSON Server dostarcza wiele przydatnych funkcji na potrzeby mock API. Najważniejsze z nich to:

Wyszukiwanie pełnotekstowe

Aby umożliwić wyszukiwanie pełnotekstowe, do URI trzeba dodać opcjonalny parametr q:

GET /posts?q=json

To zapytanie zwróci wszystkie posty, w których w jakimkolwiek polu pojawi się słowo “json”; w naszym przypadku będą to dwa posty.

Filtry

Można stosować filtry do zapytań, używając znaku ?:

GET /posts?title=json-server

To zapytanie zwróci wszystkie posty, w których tytuł to “json-server”; w naszym przypadku będzie to jeden post.

Można również połączyć kilka filtrów, dodając ampersand między różnymi filtrami:

GET /posts?title=jsonplaceholder&author=also+typicode

To zapytanie zwróci wszystkie posty, których tytułem jest “jsonplaceholder”, a autor to “also typicode”; w naszym przypadku będzie to jeden post. Należy zauważyć, że nazwisko autora jest zakodowane.

Aby dostać się do bardziej zagłębionych propertiesów, należy użyć . (kropki):

GET /posts?author.firstname=firstname

To zapytanie zwróci wszystkie posty, których imieniem autorem jest “firstname”; w naszym przypadku będzie to jeden post.

Operatory

JSON Server oferuje także operatory logiczne, niezbędne do dalszego odfiltrowywania wyników. Można użyć _gte i _lte, np.:

GET /posts?id_gte=10&id_lte=20

otrzymując w odpowiedzi 11 postów od id=10 do id=20.

Można użyć _ne, by wyłączyć wartość:

GET /posts?id_ne=10

w odpowiedzi otrzymamy 49 postów od id=1 do id=50, z pominięciem postu o id=10.

Użycie _like umożliwia przefiltrowanie po danym polu:

GET /posts?title_like=json

w odpowiedzi otrzymamy dwa posty, w których w polu tytuł pojawiło się słowo “json”.

Parametr _like rozpoznaje również wyrażenia regularne (RegExp):

GET /posts?title_like=[\s]

w odpowiedzi otrzymamy jeden post, w którym w polu tytuł znajduje się “ “ (spacja).

Stronicowanie

Domyślnie JSON Server umożliwia stronicowania z 10 elementami na stronie dzięki _page:

GET /posts?_page=2

w naszym przypadku to zapytanie zwróci 10 postów, od postu o id=11 do postu o id=20.

Domyślną liczbę elementów można zmienić, używając parametru _limit:

GET /posts?_page=2&_limit=20

w naszym przypadku to zapytanie zwróci 20 postów, od postu o id=21 do postu o id=40.

Wycinanie (slice)

Używając parametrów _start i _end lub _limit można otrzymać określony zakres elementów:

GET /posts?_start=20&_end=31
GET /posts?_start=20&_limit=11

w naszym przypadku oba zapytanie zwrócą 11 postów, od postu o id=21 do postu o id=31.

Sortowanie

JSON Server pozwala również zażądać posortowanych danych z API. Należy użyć parametrów _sort i _order dla określenia właściwości, którą chcesz sortować i jej kolejności (domyślnie kolejność jest rosnąca). Jeśli sortowanie odbywa się na polu tekstowym, to elementy będą sortowane alfabetycznie.

GET /posts?_sort=title&_order=DESC

W naszym przypadku to zapytanie zwróci wszystkie elementy posortowane malejącą względem tytułu.

Baza danych

Wykonując zapytanie:

GET /db

w odpowiedzi otrzymujemy całą aktualną bazę (snapshot):

{
  "posts": [
    {
      "id": 1,
      "title": "json-server",
      "author": "typicode"
    },
    {
      "id": 2,
      "title": "jsonplaceholder",
      "author": "also typicode"
    },
    {
      "id": 3,
      "title": "another post",
      "author": {
        "firstname": "firstname",
        "lastname": "lastname"
      }
    }
  ],
  "comments": [
    {
      "id": 1,
      "body": "some comment",
      "postId": 1
    }
  ],
  "profile": {
    "name": "typicode"
  }
}

Można również wykonać zrzut aktualnej zawartości bazy (snapshot) poprzez konsolę, w której uruchomiliśmy serwer. W tym celu w konsoli należy wpisać s i nacisnąć Enter. W odpowiedzi w konsoli otrzymamy np.:

Saved snapshot to db-1485326956546.json

a na dysku zostanie utworzony plik db-1485326956546.json ze zrzutem bazy.

Homepage

GET

Serwuje katalog ./public lub zwraca domyślny plik index (który też można zastąpić własnym):

JSON Server index page

Źródła danych

Jak już wspomniałem wcześniej, istnieją trzy możliwe źródła danych. Jeżeli nie potrzebujemy wielu danych testowych, możemy utworzyć własny, nieskomplikowany plik jsonowy i użyć go jako źródło danych dla naszego serwera.

Jeżeli jednak chcemy dysponować większą liczbą danych testowych, a nie zależy nam dokładnie na tym, jakie one są, możemy wykorzystać gotowiec w postaci JSONPlaceholder. Jest to darmowy onlineowy serwis RESTowy wspierający testowanie i prototypowanie. Nieodzowny, kiedy chcemy wypróbować jakąś nową bibliotekę, stworzyć samouczek (tutorial) lub po prostu nauczyć się kolejnego narzędzia czy frameworka. Nie musimy się rejestrować ani niczego konfigurować JSONPlaceholder oferuje nam najczęściej wykorzystywane podstawowe API:

  • /posts - 100 elementów
  • /comments - 500 elementów
  • /albums - 100 elementów
  • /photos - 5000 elementów
  • /todos - 200 elementów
  • /users - 10 elementów

Oferowane dane są relacyjne; np. posty mają id użytkownika, a komentarze - id postu. Dzięki czemu możemy budować zapytania zagnieżdżone:

GET /posts/1/comments

w naszym przypadku to zapytanie zwróci 5 komentarzy dla postu o id=1, co dokładnie odpowiada zapytaniu:

GET /comments?postId=1

Tak jak w przypadku każdego innego źródła danych, możemy wykonywać wszystkie podstawowe żądania: GET, POST, PUT, PATCH, DELETE i OPTIONS.

Aby nie musieć za każdym razem łączyć się ze zdalnym schematem (http://jsonplaceholder.typicode.com/db), można przechwycić całą bazę i zapisać ją do pliku jsonowego poprzez wprowadzenie s + Enter w konsoli, a następnie użyć takiego schematu jako nowego źródła danych.

Jeżeli jednak potrzebujemy większej ilości customowych danych testowych, należy je sobie odpowiednio wygenerować.

Generowanie danych

Jak dotąd dane wprowadzane były ręcznie lub brane ze zdalnego schematu, co działa dobrze dla większości zastosowań. Jednak, gdy trzeba będzie stworzyć bazę z większą ilością realistycznych danych, które pasują do naszego projektu, trzeba posłużyć się dodatkowymi narzędziami.

Faker.js

Pozwala na generowanie dużych ilości różnego rodzaju testowych danych i dobrze współpracuje z JSON Server.

Aby zainstalować moduł, otwórz konsolę i wpisz polecenie:

npm install faker

Teraz za pomocą faker.js możemy stworzyć skrypt do generowania 50 postów dla naszej aplikacji. Należy utworzyć plik JavaScript o nazwie users.js, który eksportuje funkcję do generowania danych:

function generateUser () {
  var faker = require('faker');
  // Change of localization, the default language locale is set to English
  faker.locale = "pl";
  
  var db = { "users": [] };

  for (var id = 0; id < 10; id++) {
    var firstName = faker.name.firstName();
    var lastName = faker.name.lastName();
    var avatar = faker.image.avatar();
    var iq = faker.random.number({min:70, max:160});
    var profile = faker.random.arrayElement(['admin', 'user', 'tester', 'moderator']);
    var phoneNumber = faker.phone.phoneNumberFormat();
    var email = faker.internet.email();
    var city = faker.address.city();
    var street = faker.address.streetPrefix() + ' ' + faker.address.streetName() + ' ' + faker.random.number({min:1, max:500});
    var motto = faker.lorem.sentence();
    var account = faker.finance.account();
    var companyName = faker.company.companyName();
    var registrationDate = faker.date.past();

    db.users.push({
      "id": id,
      "first_name": firstName,
      "last_name": lastName,
      "avatar": avatar,
      "iq": iq,
      "profile": profile,
      "phone": phoneNumber,
      "email": email,
      "city": city,
      "street": street,
      "motto": motto,
      "account": account,
      "company_name": companyName,
      "registration_date": registrationDate
    });
  }

  return db;
}

module.exports = generateUser;

Używając dodatkowo biblioteki lodash, możemy sobie uprościć nasz generator:

module.exports = function() {
  var faker = require('faker');
  var _ = require('lodash');
  return {
    "users": _.times(10, function(n) {
      var firstName = faker.name.firstName();
      var lastName = faker.name.lastName();
      var phoneNumber = faker.phone.phoneNumberFormat();
      return {
        "id": n,
        "first_name": firstName,
        "last_name": lastName,
        "phone": phoneNumber
        // ...
      }
    })
  };
};

Teraz możemy powiedzieć JSON Server, aby korzystał z tego generatora jako źródła danych:

json-server users.js

teraz wchodząc na http://localhost:3000/users, powinniśmy zobaczyć obiekt JSON z 10 fałszywymi użytkownikami, zawierającymi realistyczne dane, gotowe do natychmiastowego użycia, np.:

  {
    "id": 1,
    "first_name": "Henryka",
    "last_name": "Piórkowski",
    "avatar": "https://s3.amazonaws.com/uifaces/faces/twitter/vikashpathak18/128.jpg",
    "iq": 78,
    "profile": "moderator",
    "phone": "12-017-03-71",
    "email": "Walenty.Muszyski@hotmail.com",
    "city": "North Maurycy",
    "street": "al. Wojtczak Hills 176",
    "motto": "Sit rerum sunt nobis consectetur accusamus dolorem nisi architecto.",
    "account": "46051528",
    "company_name": "Wojtczak, Jurkiewicz and Wojtasik",
    "registration_date": "2016-09-20T21:58:51.480Z"
  }

Zamiast ciągle na nowo generować dane, można wyeksportować raz wygenerowane dane do pliku json. W tym celu trzeba lekko zmodyfikować plik users.js:

function generateUser () {
  var faker = require('faker');

  var db = { "users": [] };

  for (var id = 0; id < 10; id++) {
    var firstName = faker.name.firstName();
    var lastName = faker.name.lastName();
    var phoneNumber = faker.phone.phoneNumberFormat();

    db.users.push({
      "id": id,
      "first_name": firstName,
      "last_name": lastName,
      "phone": phoneNumber
      // ...
    });
  }

  return db;
}

console.log(JSON.stringify(generateUser()));

a następnie uruchomić następujące polecenie w konsoli:

node users.js > users.json

Taki plik możemy użyć jako nowe źródło danych.

Faker.js może generować ogromną ilość różnego typu fałszywych danych, oprócz prostych nazw i numerów, warto więc przejrzeć jego API, aby zobaczyć, które dane odpowiadają potrzebom naszej aplikacji.

Casual

Oferuje podobną funkcjonalność co faker.js. Aby zainstalować moduł, otwórz konsolę i wpisz polecenie:

npm install casual

Nasz wcześniejszy przykład dla casual wyglądałby tak:

function generateUser () {
  // Default locale is en_US; there is no pl locale
  var casual = require('casual').de_DE;
  
  var db = { "users": [] };

  for (var id = 0; id < 10; id++) {
    var firstName = casual.first_name;
    var lastName = casual.last_name;
    var avatar = '';
    var iq = casual.integer(from = 70, to = 160);
    var profile = casual.random_element(['admin', 'user', 'tester', 'moderator']);
    var phoneNumber = casual.phone;
    var email = casual.email;
    var city = casual.city;
    var street = 'ul. ' + casual.street + ' ' + casual.building_number;
    var motto = casual.sentence;
    var account = casual.card_number();
    var companyName = casual.company_name;
    var registrationDate = casual.date();

    db.users.push({
      "id": id,
      "first_name": firstName,
      "last_name": lastName,
      "avatar": avatar,
      "iq": iq,
      "profile": profile,
      "phone": phoneNumber,
      "email": email,
      "city": city,
      "street": street,
      "motto": motto,
      "account": account,
      "company_name": companyName,
      "registration_date": registrationDate
    });
  }

  return db;
}

module.exports = generateUser;

Przykładowy wygenerowany użytkownik wygada tak:

  {
    "id": 1,
    "first_name": "Waltraud",
    "last_name": "Jäger",
    "avatar": "",
    "iq": 127,
    "profile": "admin",
    "phone": "01887 / 5854912",
    "email": "Weiß_Björn@yahoo.com",
    "city": "Unter Freilitz",
    "street": "ul. Am Brückenpark 77a",
    "motto": "Mollitia cupiditate soluta perspiciatis error.",
    "account": "5250506264455321",
    "company_name": "Winkler GmbH",
    "registration_date": "22.01.2012"
  }

Casual również może generować dużą ilość różnego typu testowych danych, warto więc przejrzeć jego API, aby zobaczyć, które dane odpowiadają potrzebom twojej aplikacji.

Używanie API obu bibliotek w jest dość intuicyjne. Jak widać, większość funkcjonalności w casual i faker.js pokrywa się, natomiast niektóre się uzupełniają. Faker.js ma bardziej przejrzyste API. Jednak nic nie stoi na przeszkodzie, aby wykorzystać obie biblioteki naraz i jednocześnie korzystać z ich dobrodziejstw.

Podsumowanie

Teraz powinieneś być w stanie szybko i łatwo stworzyć własne mock API i dodać do niego potrzebne dane testowe. Jak widać, postawienie w pełni funkcjonalnego testowego REST API nie zajmuje dużo czasu, dzięki JSON Server i użytecznym generatorom danych, takim jak Faker.js i Casual. Te narzędzia mogą stać się nieodzowne w twojej pracy na frontendzie. Możesz zacząć pracę nad aplikacją bez czekania aż powstanie w miarę funkcjonalny, stabilny backend i szybciej przetestujesz nowe pomysły (prototypowanie). Będziesz mógł się zapoznać z nowymi narzędziami czy bibliotekami, a na dodatek nie musisz być online. Łatwiej porównasz również różne frameworki, dysponując spójnym i jednolitym restowym API.

Do pracy nad artykułem wykorzystano biblioteki i narzędzia w następujących wersjach:

  • Node.js: 6.9.4 LTS
  • Chrome: 55
  • json-server: 0.9.4
  • jsonplaceholder: 0.3.3
  • faker.js: 3.1.0
  • casual: 1.5.8

Autor: Łukasz Santarek

Łukasz Santarek

Programista, konsultant IT. Z wykształcenia elektronik, z zamiłowania informatyk. Interesuje się językami programowania, bazami danych oraz technikami i strategiami tworzenia oprogramowania. W pracy zajmuje się głównie Javą, a ostatnio również odnajduje się w tworzeniu aplikacji webowych, opartych głównie na Angularze. W wolnym czasie czyta beletrystykę i książki popularnonaukowe. Czasem można go spotkać w teatrze lub na leśnych szlakach.

Reactive DDD with Akka - integrating the Event Store

2016-01-08 · · ·

Introduction

It has been a while since I wrote the last episode in my series: “The Reactive DDD with Akka”. In that time, in 2015, I managed to release the two new projects:

  • Akka-DDD - project that contains reusable artifacts for building applications on top of the Akka platform, following CQRS/DDDD-based approach,
  • ddd-leaven-akka-v2 - follow-up project of the ddd-leaven-akka that makes usage of Akka-DDD artifacts

As both projects are in a good shape now, it is a high time for me to resume the series and hopefully get more feedback from the developer community. But first, let’s recall what we learned so far.

Previously we discovered that the Akka with its Akka Persistence module provided a solid platform for building micro-services, using the DDD/CQRS design principles and patterns. We learned:

  • how to implement event-sourced Aggregate Roots as persistent actors (aka clerks) [1],
  • how the command dispatching is performed by offices in the standalone and the distributed environment and
  • how the events produced by the Aggregate Roots can be transmitted reliably to other actors.

[1] Please see Don’t call me, call my office for explanation of the office & clerk concept.

Further, I noticed the lack of support of the query side of the system in the Akka Persistence, and we found out how to overcome this limitation by using an external message broker. We also noticed that if we used the Event Store as an underlying event store, we could reliably feed the query side of the system by executing the Event Store Projections (thus avoiding the necessity of introducing a message broker into the system). In my view this idea was so interesting that I decided to give it a try and that is why I started the Akka-DDD project.

In this episode we will learn how to create two kinds of journals using the Event Store Projections mechanism:

  • office journals - containing events emitted by a concrete office
  • business process journals - containing events related to a concrete business process

From the point of view of the business application requirements, these two kinds of journals are much more useful than the journals of the single Aggregate Roots (the clerk journals). We will learn how the specialized services such as View Updaters and Receptors can subscribe to these journals using the Event Store JVM Client.

Recently a new version of Akka Persistence has been released that contains Query Support on its feature list. So consequently, do we still need to use the Event Store API directly? We will answer this interesting question at the end.

However, now, we will begin with introduction to the Event Store (as a component that we want to integrate with the Akka-DDD) by looking at it from the two opposite sides:

  • ‘the write side’ - the Event Store as a journal provider
  • ‘the read side’ - the Event Store as the event bus

The Event Store as a journal provider

The clerk’s journal

The EventStore Akka Persistence is a storage plug-in (journal provider) implemented for the Event Store. Under the hood the plug-in uses Event Store JVM Client. When a persistent actor requests the persisting of an event message, the journal tells the Event Store to write the given event message to a stream with a streamId, equal to the actor’s persistenceId. If a stream with the given ID does not exist, it is automatically created by the Event Store. The Akka-DDD defines persistenceId of a persistent actor as a concatenation of officeId and clerkId (separated by a dash), where officeId must be implicitly provided for each Aggregate Root class (via OfficeId type class) and clerkId is defined as actor’s ID [2]. The [officeId]-[clerkId] is thus the ID of a stream in the Event Store being a journal of a clerk (identified by clerkId) within an office (identified by officeId).

[2] The ID of a persistent and sharded actor is extracted from the first command message, it receives.

The journal entry format

The Event Store requires the following data to create a journal entry:

  • EventId - used internally by the Event Store for idempotency
  • EventType - an arbitrary string — commonly used for events selection (see paragraph about Projections)
  • Data - actual data in a serialized form (according to the ContentType)
  • ContentType - for instance json, binary, etc
  • Metadata (optional) - additional data associated with the entry in a serialized form (according to the MetadataContentType)
  • MetadataContentType (optional) - for instance json, binary, etc.
Transforming an event to a journal entry

Before a domain event is written to an actor’s journal, it is first wrapped by the Akka-DDD in an EventMessage envelope (see: AggregateRoot#raise) and then the EventMessage is wrapped by Akka in a PersistentRepr envelope. Eventually the journal plug-in is executed to store the PersistentRepr in the actor’s journal.

Event (Domain) → EventMessage (Akka-DDD) → PersistentRepr (Akka) → Journal entry (EventStore plug-in)

The EventMessage envelope allows adding an arbitrary number of meta attributes. The Akka-DDD takes care of handling the following meta attributes:

  • id - the application level message ID (independent from the internal ID used by the Event Store)
  • timestamp - the record of the time the event was created at
  • causationId - the application level ID of some other message that caused this message (ie. commandId for the events raised by the clerks)
  • correlationId (optional) - the application level ID of a business process, that the event message is associated with
  • _deliveryId (optional) - it is used between actors that communicate using the At-Least-Once delivery semantics

The actual serialization of the PersistentRepr to the journal entry format is performed by a specialized serializer that is automatically registered by the Akka-DDD. The serializer uses json format, taking advantage of the fact that the Event Store natively supports json. The EventType attribute is set to a name of an event class. The serializer also takes care of the serializing of the metadata defined in the EventMessage. Here is an example of a journal entry for a ReservationCreated event, read from Reservation-57d868 stream (office ID: Reservation, clerk ID: 57d868):

EventType: ecommerce.sales.ReservationCreated

ContentType: json

Data: {
  "jsonClass": "akka.persistence.PersistentImpl",
  "payload": {
    "jsonClass": "ecommerce.sales.ReservationCreated",
    "reservationId": "57d868",
    "customerId": "063a80"
  },
  "sequenceNr": 1,
  "persistenceId": "Reservation-57d868",
  "manifest": "",
  "deleted": false,
  "sender": null,
  "writerUuid": "e653b38f-a034-40dd-814e-de3b02129e4d"
}

Metadata-ContentType: json				

Metadata: {
  "jsonClass": "pl.newicom.dddd.messaging.MetaData",
  "content": {
    "causationId": "8d606b8126884714b1ddfea5d0724c3c",  
    "id": "d5073d7c771246b8ac541c86a9329000",
    "timestamp": "2015-12-30T09:55:01Z"
  }
}

As you can see, although the Data element contains a json representation of an object instance of a PersistentImpl class (a class implementing a PersistentRepr trait), the EventType element contains a value that refers to the actual event. The event itself is stored under the payload attribute of the PersistentImpl object.

Please, notice also the sequenceNr attribute of the PersistentImpl. It is generated by Akka and represents a position of the entry in the actor’s journal. Since the sequenceNr is available only after an event message has been stored, the Akka-DDD distinguishes between the EventMessage - the event message to be stored in the journal and the OfficeEventMessage - the event message fetched from the journal.

The Event Store as the event bus

In general, the event bus is a layer that allows a ‘publish - subscribe’ style communication between components without requiring the components to explicitly register with one another. So far we have discussed how events get published (written to the journals) from ‘the write side’ of the system. Now it is time to describe the event subscribers - the actors that want to be notified about the published events. There are two types of the event subscribers available in the Akka-DDD:

  • View Updaters - responsible for the updating of ‘the read side’ of the system. They are interested in the events from the particular office journal.
  • Receptors - responsible for the event-driven interaction between the subsystems (event choreography), including long-running processes (sagas). They are interested in the events from a particular office journal or a particular business process journal.

For the next paragraph, let’s leave the question how the office journals and the business process journals get created. Let’s assume, they can be created.

Knowing the ID of a stream, we can use the Event Store API to register a subscriber, interested in getting events from that stream. A subscription can be defined as a ‘live-only’ (only new events get pushed to the subscriber) or a ‘catch-up’ one. A ‘catch-up’ subscription works in a very similar way to a ‘live-only’ subscription, with one notable difference: subscriber specifies the position, from which events will get pushed. A ‘catch-up’ subscription thus allows creating the durable subscribers. Such subscribers can resume processing the events as long as they are able to record position of the last processed event. The subscribers resume the processing after they were stopped or terminated and then restarted e.g. as the result of system crash. In the next episode, we will learn how toimplement the View Updaters and the Receptors using the ‘catch-up’ subscriptions. But now, let’s see how we can create new streams using the Event Store Projections.

Creating streams using the Event Store Projections

The Event Store is able to execute the built-in or a user defined projection - a chunk of javascript code containing the following elements:

  • The identifier(s) of the input event stream(s)
  • The event(s) selection(s)
  • The function(s) that accepts an event and a state as a parameter. The function can call the linkTo(streamId, event) function to write the input event into an arbitrary stream or it can call the emit(streamId, eventType, event) function to emit a new event into an arbitrary stream.

A projection will be stopped automatically after all historical events are processed unless it is started in the continuous mode. If so, also the new events will be processed as they are added to the input stream(s).

Let’s see an example. The projection below will watch the built-in $stats-[ip:host] stream containing low level system statistics for events of the type: $statsCollected and will emit a new event (of the type: heavyCpuFound) to the new heavycpu stream whenever a value of the sys-cpu statistic, read from the caught event, would exceed 40:

fromStream('$stats-127.0.0.1:2113').
    when({
        "$statsCollected" : function(s,e) {
              var currentCpu = e.body["sys-cpu"];
              if(currentCpu > 40) {
                   emit("heavycpu", "heavyCpuFound", {"level" : currentCpu})
              }
         }
    });
Creating an office journal

We learned that the stream with ID: Reservation-57d868 represents a journal of a clerk 57d868 working in the Reservation office. Now we want to create a journal that contains the events emitted by all clerks working in the Reservation office. To accomplish this, we need to use the $by_category system (built-in) projection. It turns out that the Event Store is able to extract a category of a stream from its id (treating dash (-) as a category separator). The $by_category projection, once enabled (all system projections are disabled by default), will detect the Reservation category and will create a $ce-Reservation journal for the Reservation office automatically. Similarly it will create appropriate office journals for all other offices already existing in the system or created in the future (all the system projections are running in continuous mode so we don’t need to restart them in the future anymore).

Creating a business process journal

Now, when we know how to create the office journals, we can use them as input streams for the business process journals. For example let’s create an invoicing journal that will contain all the events related to the invoicing business process:

fromStreams(['$ce-Reservation', '$ce-Invoice']).
    when({
        'ecommerce.sales.ReservationConfirmed' : function(s,e) {
            linkTo('invoicing', e);
        },
        'ecommerce.invoicing.OrderBilled' : function(s,e) {
            linkTo('invoicing', e);
        },
        'ecommerce.invoicing.OrderBillingFailed' : function(s,e) {
            linkTo('invoicing', e);
        }
    });

Source

This time we have defined journals of the two offices (Reservation and Invoice) as input streams. Then for each type of an event, relevant to the invoicing business process, we have defined a function that simply “inserts” the original event into an invoicing stream. [↓3]

[↑3] In fact, when using the linkTo function, the event inserted into the output stream is not the original event (or its copy), but a special link event containing only a pointer to the original event.

Please notice that the invoicing stream does not represent a journal of a concrete instance of the invoicing business process (an invoicing process for a concrete customer/order). Once we learn about the Saga Office (in the upcoming episode in the series) we will also learn how a special receptor (called SagaManager) takes care of forwarding the events, read from the invoicing stream to the Invoicing Saga Office that in turn forwards/routes them to the concrete clerks responsible for the management of the single business process instances. The clerks then decide which events to store in their own journals - the journals representing the single process instances.

Reading events from a journal

It is a time to learn how to implement a durable event subscriber using the Akka-DDD framework. The trait we will need to use is EventSourceProvider located in the eventstore-akka-persistence module. The trait exposes the eventSource(esConnection, observable, fromPositionExclusive): Source[EventMessageRecord, Unit] method. As the method’s signature suggests, it accepts some observable object (next to the Event Store connection object and the start position) and returns an object that is a source of the EventMessageEntry objects. The Source class is Akka’s representation of Publisher as defined by the Reactive Streams standard.

The eventSource method takes an observable BusinessEntity and obtains streamId from it by calling the StreamIdResolver. The StreamIdResolver knows how to resolve a streamId regardless whether the given entity is a clerk, an office or a saga office. The method then uses the obtained streamId to create a Publisher by calling the streamPublisher(streamId, position, ...) method provided by the EventStore JVM Client Reactive Streams API. Finally the method converts the Publisher object to a Source object that is instructed to emit the event messages (discussed previously) wrapped into an EventMessageEntry envelope.

The Akka-DDD makes use of the EventSourceProvider trait to implement the two types of the durable subscribers: the View Update Service and the Receptor. We will not dive into the implementation details of these services in this article, but as you can imagine, the stream processing is the preferred pattern used there.

The Akka Persistence Query

As stated in the docs, since version 2.4, the Akka Persistence provides a universal asynchronous stream based query interface that various journal plug-ins can implement in order to expose their query capabilities. The interface exposes the ReadJournal trait family that provides two groups of methods for the reading events from the journal: ??:

The methods that return a source, that is emitting the historical events:

  • currentEventsByPersistenceId(id)
  • currentEventsByTag(tag)

The methods that return a “live” source, that is emitting both, the past and the upcoming events:

  • eventsByPersistenceId(id)
  • eventsByTag(tag)

The journal plug-ins are not obliged to support all types of queries so they must explicitly document which types of queries they support.

As you can see, the interface supports not only queries for the events from a single journal but also the queries for the “tagged” events from an arbitrary number of journals.

Some journal plug-ins may support the EventsByTag queries out of the box by requiring events to be wrapped in an akka.persistence.journal.Tagged before they get written to the journal. (Such a wrapping could be implemented using Event Adapters). Other plug-ins may treat tags as identifiers of the arbitrary event journals such as office journals or business process journals. These journals could be managed externally (for example using the Projections in case of the Event Store (as we have seen above)).

Going back to the Akka-DDD, would it be possible to use the Akka Persistence Query instead of the EventStore JVM Client and thus to gain more interoperability? Well, currently this is not possible, because the Eventstore Akka Persistence plug-in supports only the queries for the events from a single journal (the EventsByTag queries are not supported).So the following code will not work unfortunately:

val sourceOfReservationEvents: Source[EventEnvelope, Unit] = readJournal.eventsByTag("$ce-Reservation")

Conclusion

Although the Akka Query is marked as “experimental” and the Event Store Projections are still in “Beta” version, I think, they both are worth considering when thinking about developing a new system, that is implementing the DDD/EDA/CQRS (or Microservices, if you like) architecture. Being able to easily create the arbitrary streams of events to which the interested actors can subscribe using the standard protocol (Reactive Streams) is great when heading for a loose coupling and reactiveness.

http://pkaczor.blogspot.com/2015/12/akka-ddd-integrating-eventstore.html

Autor: Paweł Kaczor

Paweł Kaczor

Software Developer, passionate about functional programming, the Scala programming language and the DDD/CQRS/ES architecture.

Gradle and groovy

2015-10-20 · · ·

groovy-logo gradle-logo groovy-logo

Gradle is a while on the market. That’s a fact. But as it is with all those new cool stuff, we keep on using “old”, bulletproof, production-proven Maven. But quite recently, a small internal project came up and we decided, it is perfect opportunity to try out Gradle.

By just opening User Guide - Introduction you would learn that Gradle is flexible like Ant, supports build-by-convention like Maven, uses powerful dependency management based on Ivy and last but not least uses Groovy instead of XML. That sounds more than promising, thats sounds just like election kind of promise promise (yup - as I write this post, parliamentary election in Poland is just around the corner).

So what really makes Gradle unique?

Tasks oriented “Ant alike” script

First feature I wanted to try was ability to create single task without having to bind it to some phase of lifecycle. With all good stuff that comes with Maven, impossibility of running single task, like populate my local DB was pretty anoying1. Here Gradle is pretty awesome. Creating tasks, making them depend on each other or simply ordering them works great. What’s more, it could be evaluated on the fly not just hardcoded!

task taskX << {
    println 'taskX'
}

taskX.dependsOn {
    tasks.findAll { task -> task.name.startsWith('lib') }
}

task lib1 {
    doLast {
      println 'lib1'
    }
}

task lib2 << {
    println 'lib2'
}

lib1.mustRunAfter lib2

task notALib << {
    println 'notALib'
}

Running taskX above will result in following (expected) order:

  1. lib2
  2. lib1
  3. taskX

Well, if this one works, let’s take some real example and set up DbUnit2.

dependencies {
    dbunit 'org.dbunit:dbunit'
    dbunit 'ch.qos.logback:logback-classic'
}

ant.taskdef(name: "dbunit",
  classname: "org.dbunit.ant.DbUnitTask",
  classpath: configurations.dbunit.asPath)

def datatypeFactoryValue = "org.dbunit.ext.mysql.MySqlDataTypeFactory"

task dataInsertDev {
    description = 'Insert XXXXX development data'
    group = 'DbUnit'
    mustRunAfter dataInsertProd
    doLast {
        def insertOpDefault = [type: "INSERT", format: "flat"]
        ant.dbunit(
            driver: project.properties.hibernateConnectionDriverClass,
            url: project.properties.hibernateConnectionUrl,
            userid: project.properties.hibernateConnectionUsername,
            password: project.properties.hibernateConnectionPassword,
            classpath: configurations.jdbc.asPath) {
            dbConfig() {
                property(name: "datatypeFactory", value: datatypeFactoryValue)
                feature(name: "http://[...]/batchedStatements", value: true)
            }
            operation( [*: insertOpDefault, src: "${devSchema}/aaa.xml"] )
            operation( [*: insertOpDefault, src: "${devSchema}/bbb.xml"] )
        }
    }
}

Writing this did not go very smoothly, took me some long minutes to figure out how to use Gradle DSL, but finally it worked!

*: groovy spread operator was used just to make code block smaller and fit my screen.

Useful like Maven

Now it was a time to convert our Maven project into Gradle one. I had some trouble understanding Maven dependency scope vs.Gradle dependency configurations (and btw. Gradle concept turns out to be much more powerful and usable).

A goal was to have Maven compile lifecycle, JaCoCo and SonarQube running.

First few minutes and already a first challenge ;) It seems that Maven’s <project><dependencyManagement> used normally in parent pom for multi-module project is not there.

But wait, I was not the first one to miss it and so there is already proper plugin: io.spring.dependency-management. JaCoCo and SonarQube are plugins too.

plugins {
    id 'io.spring.dependency-management' version '0.5.2.RELEASE'
}

apply plugin: 'java'
apply plugin: 'jacoco'
apply plugin: 'sonar-runner'

dependencyManagement {
    imports {
        mavenBom "groupId:bomArtifactId:version"
    }
    dependencies {
        dependency "groupId:artifactId:version"
    }
}

dependencies {
    compile "groupId:artifactId"
}

jacoco {
    toolVersion = "0.7.5.201505241946"
}

jacocoTestReport {
    reports {
        xml.enabled false
        csv.enabled false
        html.destination "${buildDir}/jacocoHtml"
    }
}

sonarRunner {
    toolVersion = '2.4'
    sonarProperties {
        property "sonar.language", "java"
        property "sonar.sourceEncoding", "UTF-8"
        property "sonar.host.url", "http://our.internal.server"
        property "sonar.login", "user"
        property "sonar.password", "password"
        property "sonar.jdbc.url", "jdbc:mysql://database:3306/sonarqube[...]"
        property "sonar.jdbc.username", "sonarname"
        property "sonar.jdbc.password", "sonarpass"
        property "sonar.scm.provider", "git"
    }
}

Looks pretty simple but what is important, gives you clean, test, build and assemble tasks out-of-the-box. So common Maven usage is covered.

Exporting to Maven, Ivy, Bintray repositories is covered by appropriate plugins too.

Custom ‘inline’ plugins

What I really like the most about Gradle is its flexibility. If you need any custom behaviour, just include it in script itself. It is Groovy after all! Moreover Gradle gives you much more elegant way to do it. It is enough to add buildSrc folder to your project and that is all you need to write local plugins.

OK, let’s test it. For the project itself, we are using Redmine to track issues and we track in which version the issue is fixed. Let’s generate release notes in JSON format for it. All it takes is to create a project in buildSrc folder.

Plugin build.gradle:

apply plugin: 'groovy'
repositories {
    maven {
         jcenter()
    }
}
dependencies {
    compile localGroovy()
    compile gradleApi()
    compile 'org.codehaus.groovy.modules.http-builder:http-builder:0.7.2'
}

Plugin source code itself:

package pl.gradle.hrtool.changelog

import groovy.json.JsonOutput
import groovyx.net.http.HTTPBuilder
import org.gradle.api.Plugin
import org.gradle.api.Project
import org.gradle.api.logging.Logger
import org.gradle.api.logging.Logging

import static groovyx.net.http.ContentType.XML
import static groovyx.net.http.Method.GET

class RedmineChangelogPlugin implements Plugin<Project> {
  Logger logger = Logging.getLogger(RedmineChangelogPlugin)

  void apply(Project project) {
    // Add the 'redmineChangelog' extension object
    project.extensions
        .create("redmineChangelog", RedmineChangelogPluginExtension)
    // Add a task that uses the configuration
    def generateChangelogTask = project.task('generateChangelog') << {
      def changelogProps = project.redmineChangelog
      new HTTPBuilder(changelogProps.baseUrl).request(GET, XML) { req ->

        //prepare local variables
        def localVersion = changelogProps.version ?: project.version
        def issuesUri = 'issues.xml?project_id=43' +
            '&offset=0&limit=10000' +
            '&status_id=closed&fixed_version_id='
        def versionId = changelogProps.fixedVersions[localVersion]

        //populate request
        uri.path = issuesUri + versionId
        headers.'X-Redmine-API-Key' = changelogProps.apiKey
        response.success = { resp, xml ->

          //process response
          assert resp.status == 200

          def result = [:]
          result.version = localVersion
          result.issues = [:]

          List<Object> trackers = getIssueTypes(xml)
          converIssuesToLocalList(trackers, result, xml)

          def outputFile = project.file(changelogProps.outputFile)
          writeAsJson(result, outputFile)

          logger.quiet("Changelog version is set to ${result.version}")
          logger.quiet("Changelog generated to ${outputFile.absolutePath}")
        }
      }
    }
    generateChangelogTask.description 'Retrieves release notes from Redmine'
    generateChangelogTask.group 'Changelog'
  }

  /**
   * Grab issues from XML, sort them by issue type and put it down
   * as custom map for latter JSONising.
   */
  def void converIssuesToLocalList(List<Object> trackers, result, xml) {
    // Prepare local closures
    def priority = { issue ->
      issue.priority.@id.text() as long
    }
    def id = { issue ->
      issue.id.text() as long
    }
    def issueSort = { i1, i2 ->
      priority(i1) <=> priority(i2) ?: id(i1) <=> id(i2)
    }
    def issueToMap = { issue ->
      [
          id      : "${issue.id}",
          priority: "${issue.priority.@name}",
          subject : "${issue.subject}",
          status  : "${issue.status.@name}"
      ]
    }

    // Grab and convert issues
    trackers.each { tracker ->
      result.issues[tracker] = []
      def issues = xml.'*'
          .findAll { node -> node.tracker.@name == tracker }
          .list()
          .sort(issueSort)
      issues.each { issue ->
        result.issues[tracker] += issueToMap(issue)
      }
    }
  }

  /**
   * Get all issue types - they are called trackers in Redmine
   */
  def List<Object> getIssueTypes(xml) {
    xml.issue.'*'
        .findAll { node -> node.name() == 'tracker' }*.@name
        .unique()
        .sort()
  }

  /**
   * Write it down JSON style
   */
  def writeAsJson(LinkedHashMap result, File outputFile) {
    def json = JsonOutput.toJson(result)
    outputFile.withWriter('utf-8') { writer ->
      writer.write JsonOutput.prettyPrint(json)
    }
  }
}

/**
 * Gradle plugin DSL
 */
class RedmineChangelogPluginExtension {
  def String baseUrl
  def String apiKey
  def String outputFile
  def fixedVersions = [:]
  def version
}

Plugin usage in project’s build.gradle.

apply plugin: 'redmineChangelog'

redmineChangelog {
    baseUrl 'https://redmine.consileon.pl/'
    apiKey 'aąbcćxyz'
    outputFile  "${project.properties.projectDir}/src/app/changelog.json"
    fixedVersions ((1..10).collectEntries({["1.0.${it}", "${it}"]}))
    version '1.0.0'
}

For me it is fine. I never wrote a plugin for Maven so I cannot compare it but this one was really straightforward.

Gradle way build properties and gradle-properties-yaml-plugin

Configuring the build environment in Gradle is quite similar to the way Maven does it. In simplest scenario you have properties defined in gradle.properties in your project directory and you can overwrite it with the one defined in Gradle user home.

Seems to be OK.

Default environment properties are checked into Git (or something else) but you can easily redefine it to suit your machine. But unfortunately this is a truth only for Maven and its profiles. What’s wrong with Gradle-way? Gradle.properties is not settings.xml - I mean it is not XML, but a flat property file. There are no profiles you could switch, no inline property resolving, no server credentials and no password encryption!

Let’s assume I keep an IP of my database in property hibernate.connection.host. Moreover I do it in all my projects.

So what would I do switching from project to project or from local Vagrant to not-so-local non-Vagrant machine? Should I keep copies of ~/.gradle/gradle.properties for every possible project and environment permutation?

For me, this is the place Gradle must definitely improve.

The best I could get was Gradle Properties Plugin from Steven C. Saliman. Nice plugin but still not enough. But look at the source code - according to Cloc it is 258 lines of code (excluding tests)!

258 lines? This is the effort I can risk. So I spent a day on writing and publishing my own yaml property plugin. Why YAML? I used it for Puppet, I spotted it in Grails 3. I decided to write it in similar way as Grails does, extending this by something Maven-profiles alike. To be honest, I haven’t used my own plugin in production yet, but what you should see here is, how easy it is to extend Gradle to fit your needs.

Gradle for JS

Finally, Gradle is not just for java and jvm based languages. You could easily find some promising plugins for JavaScript also. Just take a look at Asset Pipeline Core, Javascript Plugin, CSS Plugin, Dependency Lock Plugin and others.

Final word

keep-calm-and-never-stop-learning

Footnotes

  1. I'm aware that with help of profiles or combining Ant with Maven (where Ant takes from Maven properties and classpaths), it is possible to create something task alike.

  2. Yes, we do use DbUnit for populating database with various test data.

Autor: Mariusz Wiktorczyk

Mariusz Wiktorczyk

Developer, IT consultant, Software Ninja.

He is mainly working with Java and databases. From time to time also a DevOps: some experience with Puppet/Docker/Vagrant, database administration, simple Groovy scripts, setting up CI/CD in Jenkins. He is not devoted to Linux nor Windows, uses both if needed.

Privately he spent almost 5 years on squash court. Now he is more into bikes, form free trial to some basic enduro.

Java 8 - ewolucja czy rewolucja?

2014-10-07 ·

Najnowsza wersja Javy jest dostępna od jakiegoś czasu - wygląda na stabilną, powoli zaczyna być akceptowana przez firmy, które pozwalają swojm działom IT zrobić upgrade w środowiskach produkcyjnych.

Najczęściej wymieniane i dyskutowane zmiany w stosunku do 1.7 to:

  • metody default w interfejsach
  • wyrażenia lambda
  • Stream API
  • parallel streams
  • silnik JavaScript (Nashhorn) w JVM

poza tym, jest też kilka innych, moim zdaniem istotnych, ale już mniej znanych:

  • nowe metody w java.lang.Process - destroyForcibly(), isAlive() i waitFor() - pozwalają lepiej kontrolować procesy systemu operacyjnego utworzone z poziomu Javy
  • nowe date-time API (java.time.*)
  • atomowe typy i sumatory (adders) - zapewniające atomowość operacji przy wielu wątkach (java.util.concurrent.atomic.*) - i to bez blokowania
  • ‘*Exact’ w java.util.Math - wersje metod dla operacji na liczbach, które sprawdzają czy nie nastąpiło przepełnienie (overflow) dla typu który jest używany do obliczeń
  • bezpieczne generowanie liczb losowych (SecureRandom.getInstanceStrong()) - bardzo istotne w przypadku szyfrowania
  • Optional - sposób na jawne określenie czy zmienna może być null - (żegnaj NullPointerException?)

Oczywiście jest tego trochę więcej (w samym JVM), ale z punktu widzenia programisty patrzącego na możliwości języka, to byłyby rzeczy najbardziej istotne.

OK, na pierwszy rzut oka wygląda to podobnie jak ewolucja w przypadku wcześniejszych wersji - 1.4, 1.5, 1.6 czy 1.7. Trochę nowych rzeczy, trochę ‘syntactic sugar’, sporo programistów się ucieszy, paru zdenerwuje (vide: runtime generics type erasure… wrr) - nic wielkiego. Czy na pewno? Java dotychczas była postrzegana jako język w którym króluje paradygmat OO - przekazywanie zachowania było, może nie niemożliwe, ale bardzo uciążliwe i wymagało niepotrzebnego mnożenia bytów (klas). Kod robił się zagmatwany i nieczytelny. Z pewnością wprowadzanie elementów programowania funkcyjnego nie było czymś naturalnym - takie rozwiązania stosowane są raczej w odosobnionych przypadkach, kiedy jest to oczywisty wybór. Wraz z pojawieniem się lambd mamy teraz do czynienia z możliwością diametralnej zmiany w sposobie pisania kodu. Co prawda wciąż, gdy chcemy zrobić cokolwiek pojawiają się nowe i nowe klasy, co jest specjalnością Javy (konieczność utworzenia nowej klasy, tyko żeby napisać ‘hello world’ w konsoli dość dobrze ilustruje problem…) ale otworzyło się przed nami bogactwo nowych możliwości.

Spróbuję pokazać jak wygląda kod który bardzo intensywnie wykorzystuje nowości z Java 8.

Załóżmy sobie, że mamy następujący problem do rozwiązania: plik CSV z danymi dotyczącymi siły wiatru w węzłach (takie osobiste skrzywienie będące skutkiem uprawiania sportu zależnego od wiatru :) ) oraz opadów z podziałem z dokładnością co do 1 godziny każdego dnia, takiej oto postaci:

DATE	00h	01h	02h	03h	04h	05h	06h	07h	08h	09h	10h	11h	12h	13h	14h	15h	16h	17h	18h	19h	20h	21h	22h	23h	00h	01h	02h	03h	04h	05h	06h	07h	08h	09h	10h	11h	12h	13h	14h	15h	16h	17h	18h	19h	20h	21h	22h	23h
01.01.2014	10	9	10	10	10	10	10	10	10	10	10	9	9	9	9	10	9	9	10	7	8	8	8	8	-1	-1	-1	-1	-1	-1	-1	-1	-1	-1	-1	-1	-1	-1	-1	-1	-1	-1	-1	-1	-1	-1	-1	-1	
02.01.2014	9	7	8	9	10	10	11	9	10	11	12	11	12	10	10	11	11	11	11	8	8	9	9	10	-1	-1	-1	-1	-1	-1	-1	-1	-1	-1	-1	-1	-1	-1	-1	-1	-1	-1	-1	-1	-1	-1	-1	0.1	
03.01.2014	10	8	8	8	9	8	9	7	7	7	8	8	9	7	9	11	12	13	14	12	13	13	14	13	0.3	0.2	0.3	0.1	-1	-1	-1	-1	-1	-1	-1	-1	-1	-1	-1	-1	-1	-1	-1	-1	-1	-1	0.2	0.2	
04.01.2014	14	12	15	16	16	16	15	13	13	12	10	9	9	7	8	9	10	11	12	10	14	16	16	17	-1	-1	-1	-1	-1	-1	-1	-1	-1	-1	-1	-1	-1	-1	-1	-1	-1	-1	-1	-1	-1	-1	-1	0.3	
05.01.2014	17	16	14	12	11	11	11	8	11	11	11	11	11	9	10	11	11	12	11	11	12	11	10	11	1.2	1	1	1.1	1	0.7	0.1	-1	-1	-1	-1	-1	-1	-1	-1	-1	-1	-1	-1	0.5	0.8	0.7	0.3	-1	
0
...

i zadanie znalezienia miesięcy w których był przynajmniej jeden dzień w którym w godzinach, powiedzmy 9:00-18:00 wiał wiatr o sile przynajmniej 16kt i średni opad w tym czasie wynosił poniżej 0.2. Załóżmy też, że ilość danych wejściowym może być na tyle duża, że będziemy unikać przetwarzania całości w pamięci. W pierwszej wersji będziemy je pobierać z pliku CSV ale potencjalnie może być to też web-service, więc dobrze byłoby zachować odpowiedni poziom abstrakcji co do źródła danych. Mając do dyspozycji nowinki z Java 8, można ten problem rozwiązać szybko i dosyć elegancko. Wykorzystamy nowe metody w java.nio., Stream API, oczywiście wyrażenia lambda, nowe klasy/metody do operacji na czasie (java.time., java.time.format.*).

Najpierw przyda się klasa, która będzie reprezentowała wiersz w naszym pliku CSV, który jest dosyć specyficzny:

    1. kolumna to data w formacie dd.MM.yyyy
  • kolumny 2-25 to wartości (liczby całkowite) siły wiatru dla kolejnych godzin 00h, 01h…23h
  • kolumny 26-49 to wartości (zmiennoprzecinkowe) średnich opadów w kolejnych godzinach 00h, 01h…23h Czyli potrzebujemy pobrać pierwszą kolumnę, skonwertować na datę, oraz pozostałe rozdzielić na 2 tablice o różnych typach, np. tak:
class WindDataRow {
	LocalDate date;
	int wind[];
	double percip[];

	public WindDataRow(LocalDate date, int[] wind, double[] percip) {
		super();
		this.date = date;
		this.wind = wind;
		this.percip = percip;
	}

	private static final DateTimeFormatter  dateFormatter = DateTimeFormatter.ofPattern("dd.MM.yyyy");
	
	public static WindDataRow fromCSVLine(String[] columns) {
		LocalDate date = LocalDate.parse(columns[0], dateFormatter);

		int[] wind = Arrays.stream(columns).skip(1).limit(24)
                                       .mapToInt(Integer::valueOf).toArray();
		double percip[] = Arrays.stream(columns).skip(25)
                                            .mapToDouble(Double::valueOf).toArray();

		return new WindDataRow(date, wind, percip);
	}
}

Wszystko wygląda dosyć standardowo, za wyjątkiem użycia stream’ów do konwersji strumienia String’ów na tablice int[] i double[].Użyty został także nowy lepszy (w końcu!) typ LocalDate dla reprezentacji czasu oraz tread-safe DateTimeFormatter zamiast popularnego SimpleDateFormat (który z jakiegoś niezrozumiałego powodu jest wewnętrznie modyfikowalny i ma stan).

Teraz zabierzmy się za pobranie danych:

	public List<LocalDate> findTheGoodTimes(Path path, 
			Predicate<WindDataRow> filterPredicateFunc, 
			TimeSpanHours hours, double minWind, double minPerc) throws IOException, ParseException {
							
		Objects.requireNonNull(path);

		List<LocalDate> results;
		try (Stream<String> linesStream = Files.lines(path)) {

			Stream<WindDataRow> objStream = linesStream.skip(1)
					.map(line -> line.split("\t")).map(WindDataRow::fromCSVLine);
			
			results = processData(filterPredicateFunc, hours, minWind, minPerc, objStream);

		}

		return results;

	}

Tu ciekawie - po pierwsze użyłem konstrukcji ‘try-with-resources’ korzystając z faktu, że Stream implementuje interfejs java.lang.AutoCloseable (niezależnie jak został utworzony). Po drugie - bardzo eleganckiej metody Files.lines(), która potrafi dostarczyć nam zawartość pliku linia po linii jako strumień. Krótko i konkretnie, nigdy czytanie plików w Javie nie było takie proste.

Z innych ciekawostek - dodałem jako parametr możliwość przekazania funkcji (Predicate), która wykona jakiś rodzaj filtrowania na strumieniu naszych obiektów WindDataRow, którą postaram się wpleść jakoś w kod przetwarzający dane wejściowe.

Zaczynamy przetwarzać strumień - pomijamy pierwszą linię (skip(int)), tniemy (mapujemy) linię na kolumny prostym String.split(“\t”) a następnie mapujemy tablicę String’ów na nasz POJO podając po prostu metodę która ma zostać użyta do konwersji. Wygląda jak C++, prawda? ;) Jako bonus - użyłem nową metodę Objects.requireNonNull() która rzuci wyjątek gdy argumenty metody nie będą spełniały kryteriów.

Teraz mamy już strumień POJO z posegregowanymi danymi - wystarczy przefiltrować dane na różne sposoby oraz pogrupować wyniki miesiącami, co można zrobić tak:


  public List<LocalDate> findTheGoodTimes(Path path, 
			Function<Stream<WindDataRow>, Stream<WindDataRow>> extraFilterFunc, 
			int startHour, int endHour, double minWind, double minPerc) throws IOException, ParseException {

		Objects.requireNonNull(path);
		int hourLimit = endHour - startHour;

		List<LocalDate> results;
		try (Stream<String> linesStream = Files.lines(path)) {

			Stream<WindDataRow> objStream = linesStream.skip(1)
					.map(line -> line.split("\t")).map(WindDataRow::fromCSVLine);
			
			Map<LocalDate, List<WindDataRow>> groupedByMonths = 
					extraFilterFunc.apply(objStream)
					.filter(e -> Arrays.stream(e.percip).skip(startHour).limit(hourLimit)
									.average().getAsDouble() < minPerc)
					.filter(e -> Arrays.stream(e.wind)
									.skip(startHour).limit(hourLimit)
									.average().getAsDouble() > minWind )
					.collect( 
							Collectors.groupingBy(
									e -> LocalDate.of(e.date.getYear(), e.date.getMonthValue(), 1)
							)
					);
			
			results = groupedByMonths.keySet().stream().sorted()
					.peek(System.out::println)
					.collect(Collectors.toList());

		}

		return results;
  }

Mamy tutaj najpierw użycie arbitralnego wyrażenia Predicate przekazanego ‘z góry’ (nie wiemy i nie musimy wiedzieć co potencjalnie ono robi) oraz kolejno filtry z wyrażeń lambda, które obliczają średnią (oczywiście z użyciem Stream API) z danych dot. wiatru i wilgotności w zadanych godzinach i porównują wynik z warunkami min/max. Mamy już podzbiór danych, które spełniają kryteria, teraz trzeba je zebrać ( .collect() ), grupując miesiącami, co ułatwia predefiniowany Collectors.gruppingBy(…). Zbiór kluczy z wynikowej mapy (czyli miesiące) sortujemy i zamieniamy na listę, która jest końcowym wynikiem. W ramach podglądu - dodałem wywołanie .peek(…) które jest sposobem na zrobienie czegoś z pośrednim wynikiem przetwarzania strumienia, bez jego modyfikacji - z reguły do logowania i debugowania (można w zasadzie wszystko, ale ‘side-effects’ spowodują komplikacje przy próbie równoległego wykonania…).

Przydałoby się jakoś ten cały nowoczesny kod uruchomić, więc dodam klasę z metodą main() i zdefiniuję sobie jeszcze dodatkową funkcję (Predicate) który przefiltruje strumień naszych POJO pod kątem zadanego przedziału czasowego. Oczywiście przekażę tą funkcję jako zwykły parametr (ot tak, bo mogę!). Niestety, typy generyczne powodują, że nie wygląda to idealnie przejrzyście, ale coś za coś…:

	public static void main(String[] args) throws IOException, ParseException {
		
		LocalDate startDate = LocalDate.of(2013, Month.DECEMBER, 31);
		LocalDate endDate = LocalDate.of(2014, Month.JULY, 1);
		
		final TimeSpanHours hours = new TimeSpanHours(9, 18);
		
		
		Predicate<WindDataRow> filterByTimePredicateFunc = 
				e  -> e.date.isAfter(startDate) && e.date.isBefore(endDate);
		
		new WeatherStatsAnalyzer().findTheGoodTimes(
				Paths.get("wg_data.csv"), filterByTimePredicateFunc, hours, 16, 0.2
		);
	}

(TimeSpanHours to tylko małe ‘opakowanie’ dla przedziału czasowego w godzinach)

Wynik uruchomienia to:

2014-01-01
2014-02-01
2014-03-01

wypisane na konsoli (dzięki wywołaniu .peek(…) ). Gotowe :)

Podsumowując, zadanie nie było bardzo skomplikowane i prawdopodobnie szybciej i łatwiej byłoby wrzucić dane do relacyjnej bazy danych jednym poleceniem z poziomu Bash’a i wyciągnąć dane jednym, choć dosyć złożonym, zapytaniem SQL. Z tą różnicą, że w powyższym przypadku nie ogranicza nas ilość danych wejściowych. Całe przetwarzanie odbywa się linia po linii. Bardzo łątwo jest zmodyfikować kod tak, żeby dane nie były pobierane z pliku tylko z jakiegokolwiek źródła - np. WebService poprzez podstawienie innego strumienia zamiast naszego ‘linesStream’. Nie musimy w ogóle dotykać kodu który przetwarza później dane (i zrobić strumień parametrem metody). Możemy też, w przypadku gdy źródło jest wolne - dodać magiczne słowko ‘parallel’ gdy tworzymy strumień i przetwarzanie zostanie wykonane na wszystkich dostępnych rdzeniach CPU. Tutaj uwaga: należy być ostrożnym w przypadku gdy nie jest to program samodzielny i pulą wątków zarządza np. web server - każdy wątek przetwarzający request zacznie sam mnożyć wątki… i możemy osiągnąć skutek odwrotny do zamierzonego. W powyższym rozwiązaniu jest jednakże pewne silne podobieństwo do języka SQL - wynika to z faktu, że kod stał się dużo bardziej deklaratywny niż imperatywny. W SQL nie mówimy przecież jak silnik BD ma iterować po encjach, jak obliczać średnią czy ma to robić na 1 czy wielu wątkach, po prostu mówimy czego oczekujemy. Tak jak, w dużej mierze, w naszym przykładzie. Zadziwiające, że manipulowaliśmy na kilku tablicach, listach i mapach i nie użyliśmy ani razu pętli programowej (for/while), prawda?

Programiści używający chociażby Pythona uśmiechną się teraz z politowaniem, ale, moim skromnym zdaniem, dla Javy to z pewnością jest rewolucja. Możliwość swobodnego przekazywania zachowania a nie tylko samych danych ma szansę mocno zmienić styl programowania w Javie nie tylko w detalach ale również na poziomie struktury aplikacji. Ja osobiście widzę wzorce projektowe jako usystematyzowane sposoby na obejście niedoskonałości i ograniczeń konkretnego języka programowania. Mam tu na myśli wzorce dotyczące konstrukcji programów, nie bardziej ogólne dot. architektury (np. MVC). Niestety, trzeba przyznać, że Java ma wyjątkowo dużo wzorców projektowych, co wcale nie jest konsekwencją wspaniale rozwiniętego środowiska programistów, ale właśnie bardzo ograniczonego (sztywnego) języka. Mając do dyspozycji Javę 8 wygląda, że należy się przyjrzeć krytycznie zwłaszcza tzw. behavioral design patterns, takim jak Command, Observer, Template Method, Strategy czy Chain of Responsibility. Z pomocą wyrażeń lambda, można je uprościć albo całkiem wyeliminować i może przestać nazywać wzorcami projektowymi, skoro są czymś oczywistym i taki np. CoR można zaimplementować tworząc ciąg wyrażeń lambda, Command z kolei to… po prostu lambda a i np. Decorator pattern da się często sprowadzić również do użycia lambdy…

Czas pokaże, na ile zmieni się sposób programowania w Javie i czy koncepcje OO wciąż będą remedium na wszystkie problemy.

[kompletny kod jest dostępny jako repozytorium GIT’a]

Autor: Bartłomiej Nićka

Bartłomiej Nićka

Programista, konsultant IT. Interesuje się technikami i językami programowania - w pracy zajmuje się głównie Javą jak również rozwijaniem aplikacji na platformę iOS (w Objective-C). Bez Linux'a, Bash'a, VIMa i tiling Window Managera (XMonad) prawdopodobnie nie umiałby obsługiwać komputera ;) W wolnym czasie puszcza latawce.

Fast terminal file system navigation

2014-07-15 · ·

When it comes to file system navigation in terminal, default solutions often are too clumsy. In bash autocompletion is annoying because of case-sensitivity. On the other hand zsh can autocomplete case insensitively and with fuzzy string searching but it matches only names in the working directory.

Thankfully there is a tool for the most popular shells that greatly improves navigation speed: autojump. Bascially it remembers (in own database) every directory you’ve visited and allows you to easily jump to them via autojump or more convenient j command.

Installation

Autojump can be easily installed via following package tools: yum, apt-get, brew, ports. For this post I’m using Mac OS X with zsh and brew.

brew install autojump

After installation completes one last thing must be done: autojump.sh must be added to the terminal rc file (.zshrc in my case, lines suggested by the brew):

[[ -s `brew --prefix`/etc/autojump.sh ]] && . `brew --prefix`/etc/autojump.sh

Usage

The key to successful autojumping is to get rid of habit of cd usage. Instead of typing few cd .. and then cd <tab> just use j alias.

This post is based on the following example: we have a projects directory which contains exact client names, which further contain exact project names.

projects
├── Bathing Company Inc
│   └── bath-shop
├── Cinnamon Cafe
│   └── gadget's-shop
└── The Washers
    └── shop

First things first: create projects with Bathing Company Inc, then visit it and navigate somewhere else (home should be fine). To get back to that nested, annoying space-named directory simply enter j bath.

Matching multiple directories

When navigating through the file system for a while you will visit directories with the same name or same name parts. This is easily handled by the autojump.

For this example every directory in the projects tree must be visited.

Let’s try to enter Cinnamon Cafe’s shop (j shop<tab>). It expands to something like this:

j shop__

Hit tab again and you will get prompt like this:

shop__1__/Users/username/projects/Bathing\ Company\ Inc/bath-shop
shop__2__/Users/username/projects/Cinnamon\ Cafe/gadget\'s-shop
shop__3__/Users/username/projects/The\ Washers/shop

At the first glance it’s ugly and messy. Nothing further from the truth. Just look at ending of the prompt, then look at the number. It is indexed for the convenience! Instead of typing Cinnamon Cafe’s in our case we just add 2 to our j shop__ and hit enter.

j shop__2

Then we navigate to the Bathing Company’s shop.

j shop__1

Fast and simple. But there is more goodness in the autojump. It reorders indexes based on the usage. So after we’ve jumped few more times to the Cinnamon’s Cafe, we will get the folowing prompt:

shop__1__/Users/username/projects/Cinnamon\ Cafe/gadget\'s-shop
shop__2__/Users/username/projects/Bathing\ Company\ Inc/bath-shop
shop__3__/Users/username/projects/The\ Washers/shop

Notice that 1 is now Cinnamon Cafe and 2 is Bathing Company.

Deleting directories

Removing directories in the file system is also supported by the autojump. Deleting whole The Washers directory and trying to jump to the shop will give us prompt without deleted directory:

shop__1__/Users/username/projects/Cinnamon\ Cafe/gadget\'s-shop
shop__2__/Users/username/projects/Bathing\ Company\ Inc/bath-shop

Known bugs

As stated on the project’s page:

  • autojump does not support directories that begin with -.
  • For bash users, autojump keeps track of directories by modifying $PROMPT_COMMAND. Do not overwrite $PROMPT_COMMAND

Autor: Tomasz Wójcik

Tomasz Wójcik

Programista, konsultant IT. W pracy zajmuje się głównie Javą, skrupulatnie zgłębia tajniki Rubyego na szynach. Kiedyś programował gry w C, Objective-C i ActionScript 3 (oraz sterowniki w asemblerze), teraz robi to wyłącznie po pracy. Wielki zwolennik gita.